FROM IDEA TO FIRST SEQUENCE
Your first TakeZero video
Create reference images, generate videos, and arrange them into your first sequence.
- References
- Images
- Videos
- Timeline
Before you start
For this quick start, generate a character reference and a setting, then create a video and preview it on your timeline.
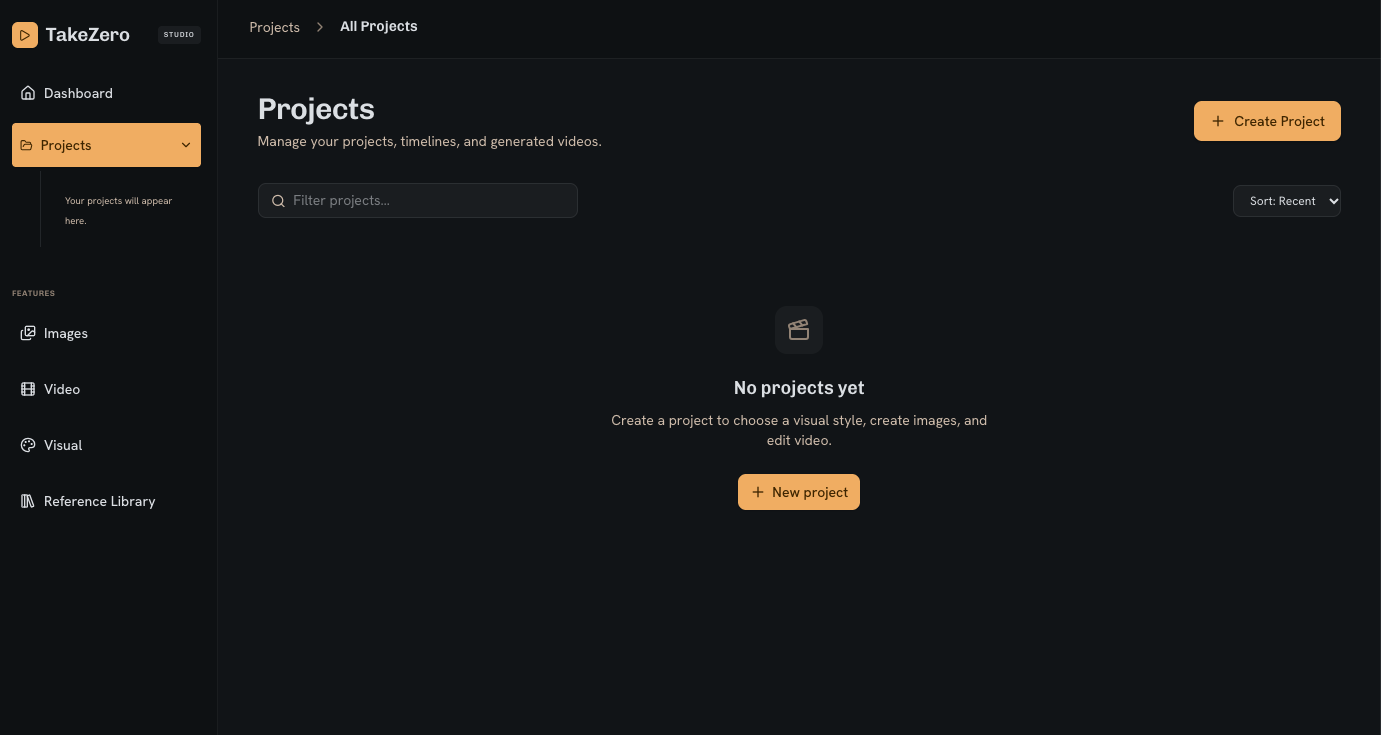
Open TakeZero1. Create a project
- Projects
- New project
Name your project Blockbuster, 2004. Open its Style page and choose a visual direction.
2. Generate your character and setting
- Your project
- Images
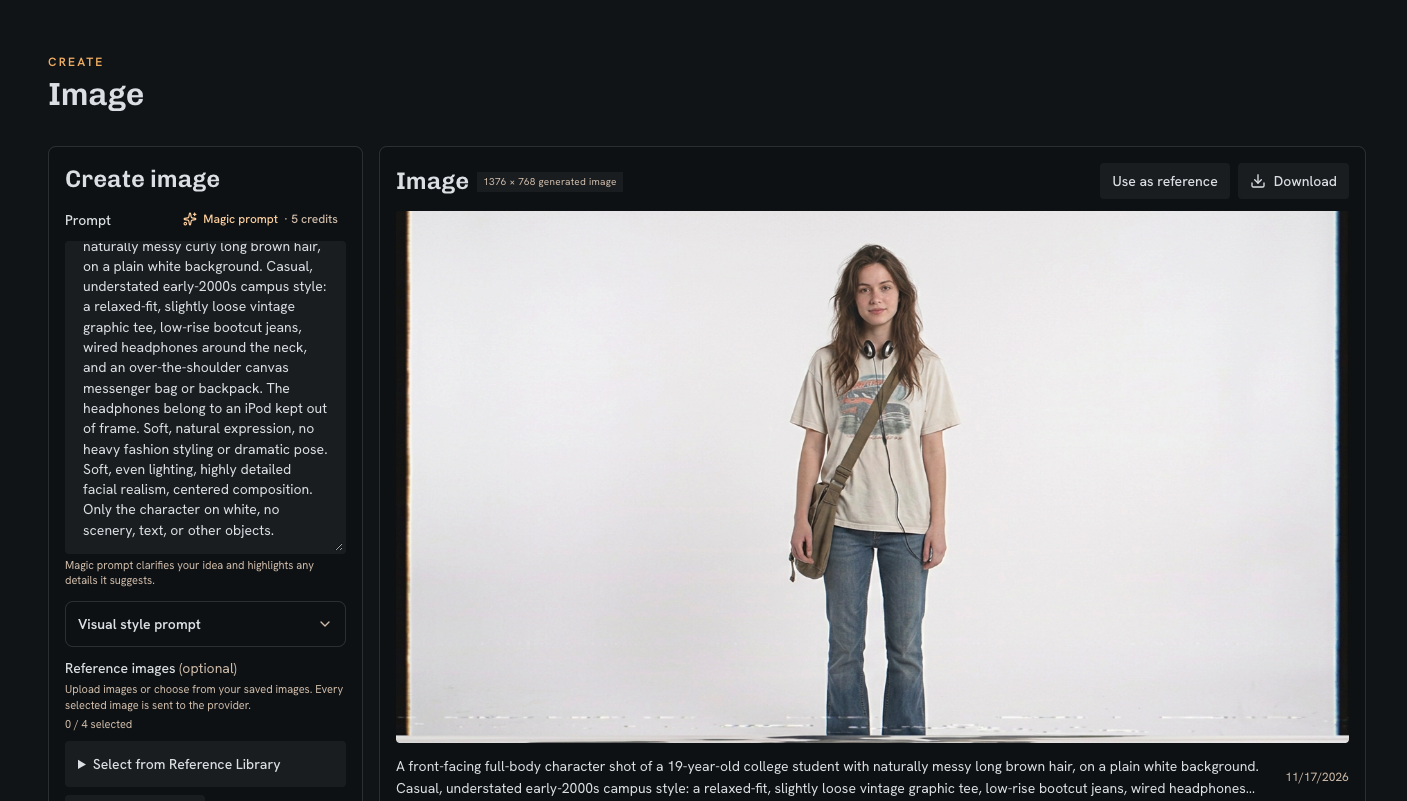
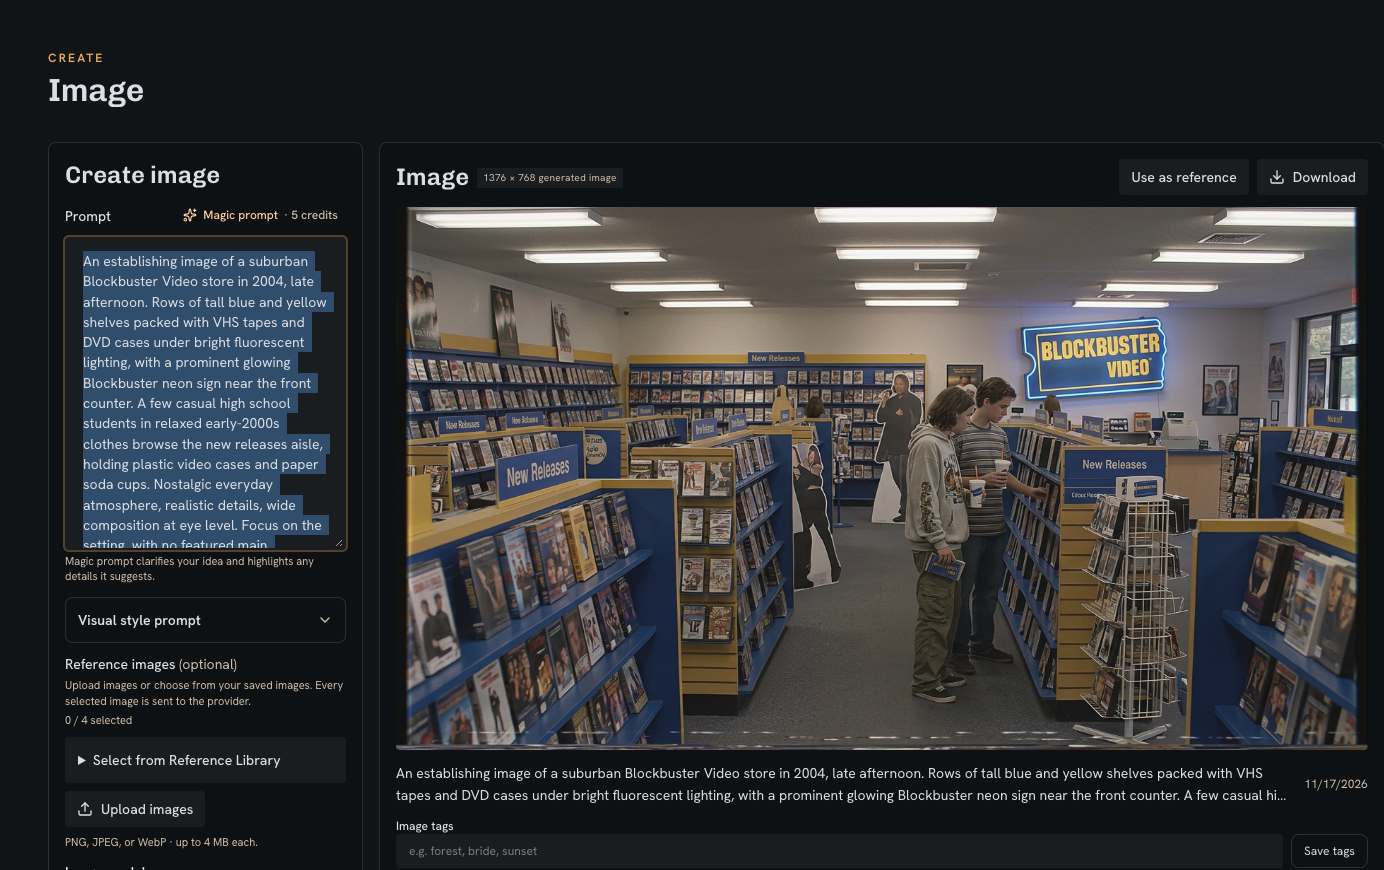
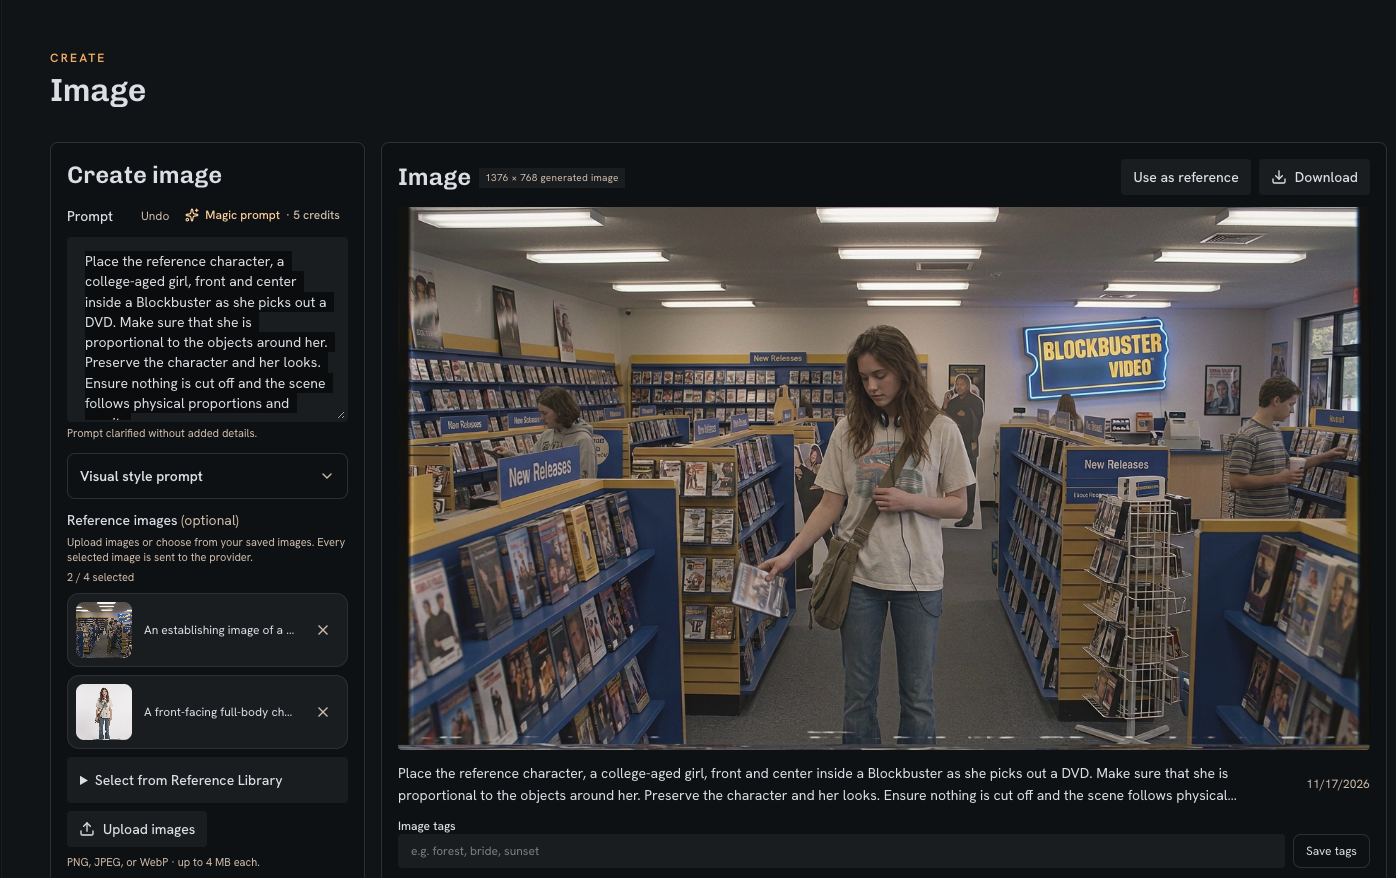
Generate the full-body character image first, then generate the Blockbuster setting using the second prompt. Select both generated images as references and use the final prompt to place the character in the scene.
1. Generate character
Image prompt — use in Step 2
A front-facing full-body character shot of a 19-year-old college student with naturally messy curly long brown hair, on a plain white background. Casual, understated early-2000s campus style: a relaxed-fit, slightly loose vintage graphic tee, low-rise bootcut jeans, wired headphones around the neck, and an over-the-shoulder canvas messenger bag or backpack. The headphones belong to an iPod kept out of frame. Soft, natural expression, no heavy fashion styling or dramatic pose. Soft, even lighting, highly detailed facial realism, centered composition. Only the character on white, no scenery, text, or other objects.
2. Generate setting
Image prompt — use in Step 2
An establishing image of a suburban Blockbuster Video store in 2004, late afternoon. Rows of tall blue and yellow shelves packed with VHS tapes and DVD cases under bright fluorescent lighting, with a prominent glowing Blockbuster neon sign near the front counter. A few casual high school students in relaxed early-2000s clothes browse the new releases aisle, holding plastic video cases and paper soda cups. Nostalgic everyday atmosphere, realistic details, wide composition at eye level. Focus on the setting, with no featured main character. No smartphones or modern digital advertising screens.
3. Place character in setting
Image prompt — use in Step 2
Place the reference character, a college-aged girl, front and center inside a Blockbuster as she picks out a DVD. Make sure that she is proportional to the objects around her. Preserve the character and her looks. Ensure nothing is cut off and the scene follows physical proportions and gravity.
3. Generate your video and preview it on the timeline
- Your project
- Video
Choose the combined character-and-setting image as the start image and select a video model. Describe the movement you want, then generate one video. You do not need an end image for this exercise; choose a model that supports a start image on its own.
Add the generated video to your project timeline if it is not already attached to a clip. Adjust the clip’s timing if needed, then preview from the beginning.
Best practices
- Review your image before animating it; unexpected details can carry into the video.
- Start with one subject action and one camera move. Change one input at a time when refining a result.
- Check generation status before retrying; each retry can use additional credits.
- Save useful prompts and keep independent copies of important media.
Next steps
When you’re ready to build a longer sequence, reuse your image as a reference for a new image, animate it, and add another clip. If you’re making a tutorial, show your chosen prompt, image, and video side by side.
Learn to reuse reference imagesExplore the guides
Go deeper when you need it. Each guide focuses on one part of your creative workflow.
Build the images that define your characters, locations, and visual direction.
VideosDirect the action and camera movement, starting from an image you already like.
ProjectsKeep each project organized in its own workspace, and switch between projects as you create.
Visual StylesChoose a reusable visual direction for your images, from cinematic lighting to an illustrated look.
Reference LibraryBuild a reusable collection of images for your characters, places, and visual inspiration.
Pricing and subscriptionsBuy a pack for a single project or choose a monthly plan for ongoing work. All prices are in US dollars.
Usage & creditsKnow what is available, what is pending, and what a retry means before you generate.
TroubleshootingFind a missing video, fix timeline playback, or recover edits after a save fails.